If you’re managing multiple accounts in e-commerce, marketing, SEO, or data research, stability, privacy, and control are non-negotiable. BitBrowser isn’t just another browser — it’s a secure, purpose-built environment designed for professionals who work at scale.
Each profile in BitBrowser operates in a fully isolated session, complete with a unique browser fingerprint tailored to your proxy setup. This helps you simulate authentic user behavior, avoid bans, and maintain the integrity of your accounts across platforms. Built on deeply customized versions of Chromium and Firefox, BitBrowser offers unmatched stability, even during long sessions or complex automations.
With 10 free profiles included by default, you can start working immediately — no subscriptions or complicated setup required. Whether you’re running solo or managing a large team, BitBrowser supports efficient, secure collaboration through advanced permission settings. You can assign access to specific store environments, authorize logins, and manage workflows without ever compromising account security.
BitBrowser protects your local data while ensuring each session runs with clean device info and a pristine IP footprint. It’s trusted by professionals who need reliable performance under pressure — not just to browse, but to build, automate, and scale.
If you’re ready to take your multi-account strategy to the next level, BitBrowser is the tool that makes it possible. Start today at BitBrowser.net.
ResiProx x BitBrowser
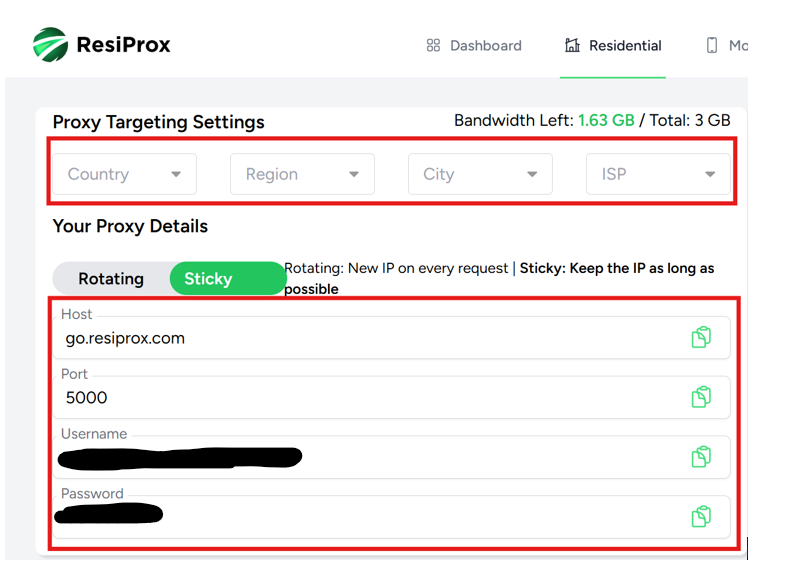
First, log in to ResiProx account and select type of Proxy, Country, Region, City etc. At the bottom, you will see the proxy details.
Configure Scrapeless Proxy in BitBrowser
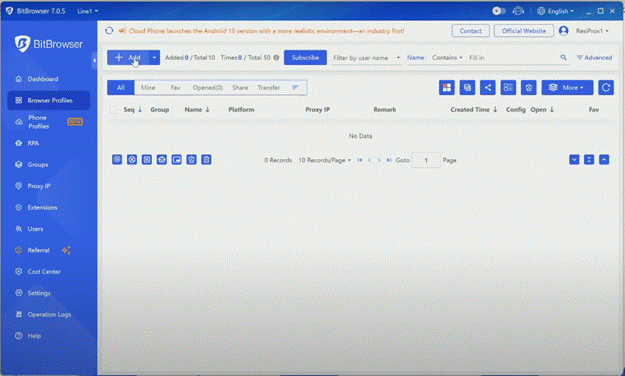
- Log in to BitBrowser and find the “Browser Profile” button, as shown in the following figure and click Add.
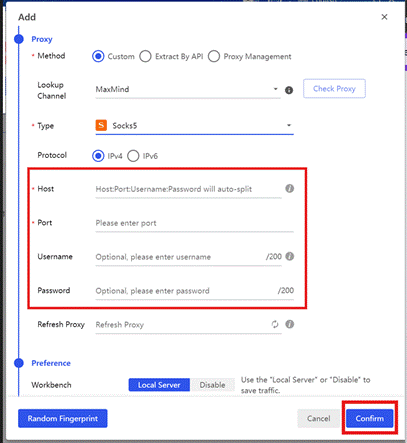
- Create a Profile Name

- Scroll down to find the Proxy section. Select Custom, and under proxy type, choose HTTP or SOCKS5 — ResiProx supports both.

- Now copy the proxy details — host, port, username, and password from your ResiProx dashboard and paste them into the corresponding fields. And click Confirm
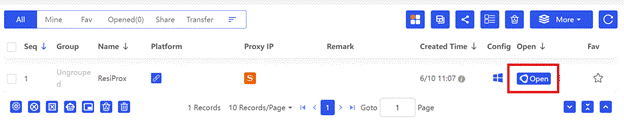
- Now click Open, and your BitBrowser profile with ResiProx proxy is ready to use.